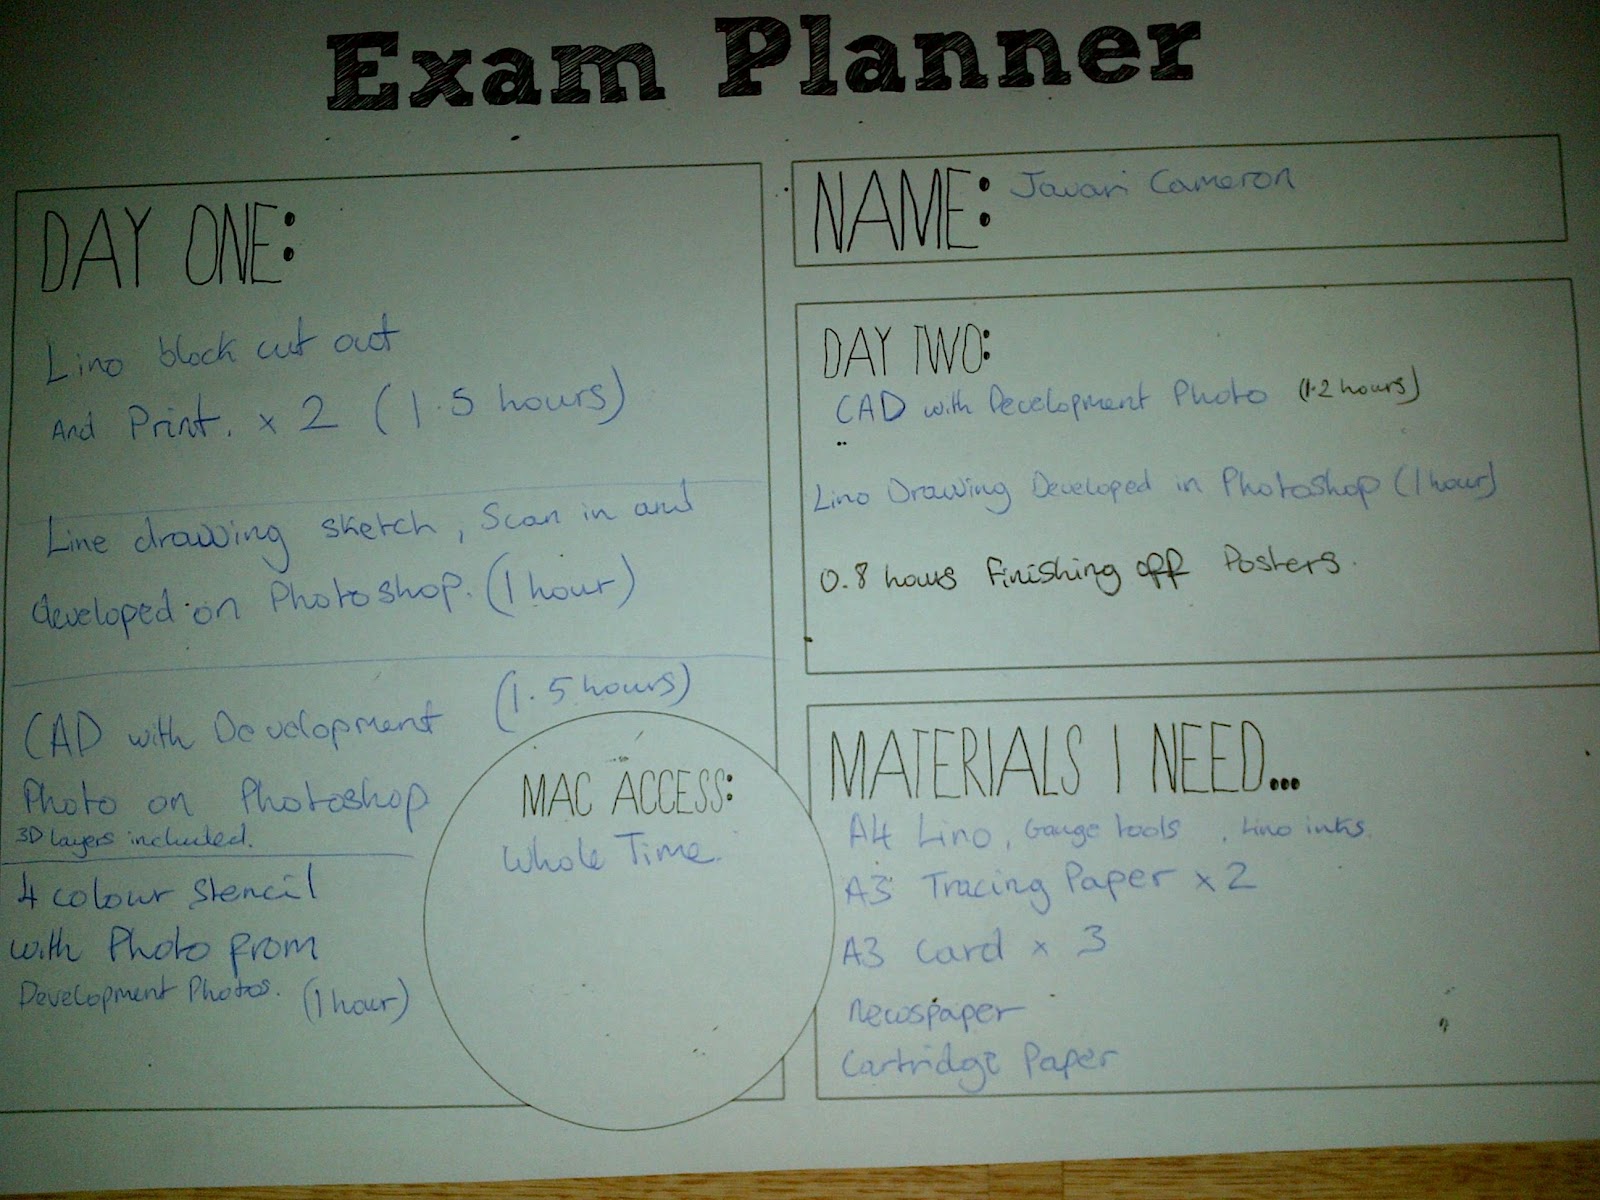
Electrifying Poster design Tutorial
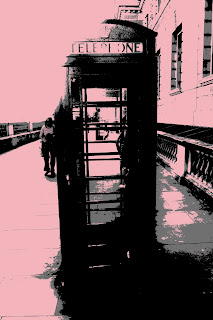
the first step I made to making this Poster was to use a tabloid sized document in Photoshop I then used a gradient fill in a Radial style scaled to 150% in reverse, I then reduced the opacity of this layer to 75% and created a new layer I then created a new gradient adjustment layer and customized it with 2 colours of my own which where directed at a 45 degree angle and reduced the opacity of this layer to 25%. I then Placed the image of the Taxi as the taxi had a complexed background I used the Magnetic Lasso tool to pre-cut the image and used the refine edges tool overlayed the Image to give the smooth edges of the car and wheels I added a Layer mask to the image, I saved the image them file placed it into Photoshop on the poster I scaled the image a suitable size for the poster. I then created the diagonal bars by creating a new layer, then selected the rectangular marquee tool and created a selection and filled it with black I then went to edit transform and skew; with this tool I used the top middle selection and skewed the bar to the right, I then went to edit transform and rotate, whilst holding the shift key the rotation was done in 15 degree increments I chose a suitable rotation for the bar and made a brush with the bar by going to edit define brush and named it to diagonal bars I then deactivated the selection and deleted the layer.
I then created a new layer and positioned it under the layer of the taxi and named it dual diagonal bars I then selected the brush tool and selected the brush that I just created I went to window brushes to show the brushes pallet I ticked the shapes dynamic option and set the size jitter to 100% and I did the same for the scattering option i began painting with a foreground colour of black in the way that I wished to. I added a gradient to this style by selecting the layer and going to blending style I then chose Gradient overlay and selected a spectrum effect then the angle to -45% and scaled it to 150%. I then created a 3D version of the diagonal Bars by creating a new layer and positioned it as the top layer and named it 3D diagonal bars, I then set the foreground colour to white and painted some bars I then held the control/command key and clicked on the layer to get a selection of the bars I then went to the paths pallet and created a vector path using the selection afterwards I when to 3D and Repousse'd the selected path I then rotated 3D object made to my liking. I set the lights to CAD optimize and adjusted the depth to reduce the thickness of the 3D layer. I then went to layer, layer style and gradient overlayed the 3D layer and set the gradient to spectrum and scaled to 150% I adjusted the angle setting to the direction of the diagonal bar I clicked and dragged directly on the image to get the colours I wanted from the spectrum selection. I then went to colour overlay and set the blend mode to overlay and used a colour of my choice. I then rasterized the image by bring up the 3D window and used ray trace final after this process I the clicked on the layer and rasterized 3D and positioned it under the layer of the girl I put these effects into a group by pressing control/command G. I the held the alt/option key and duplicated the layers as I dragged it. I then named this group to 3D diagonal bars I then selected the Move tool and moved it into the position I wanted; I then converted this into a smart object by going to layer smart object and converted it into a smart object. I then went to layer new adjustment layer and brightness/contrast and check-marked the use previous layer to create clipping mask I the used the legacy of the layer and set the brightness and contrast to 50. I then created a new document to 100 by 100 pixels and selected the rectangular marquees tool and set the option to fixed size ' width to 100 percent and height to 25px'. I made a selection and filled it with black I then duplicated the layer I then used the offset filter and made the vertical setting to 50. I then used the crop tool to rotate the image 45 degrees and dragged the sides to the document edge. I then went to edit and define pattern and set the name to diagonal interlace, I then closed the file without saving it and selected the ellipse tool and set the shapes style to default/none I then selected the ellipse option of using a circle and created one on the original document
I the clicked on the layer and chose blending options and set the fill opacity to 0% I then went to pattern overlay and set the blend mode to screen and selected the diagonal interlace pattern that was created. I adjusted the scale to suit the image and renamed the layer to interlaced circles. I then added this to shapes after clicking the ellipse tool and drew a few more circles. I then duplicated the layer and placed it under that taxi and added more cicrles and reduced the opacity of these layers to add transparency I then created a new layer and named it star filter and positioned this layer above the blending fill layers and changed the blending mode to screen and filled it with black I then selected the brush tool and brought up the brush pallet and enabled the shapes dynamics and set it to 100% and scattered it to 1000% painted in the areas that I wanted the star filters and duplicated the layer (command J), I then used the motion blur filter and set the angle to 45 degrees and adjusted the settings to give a suitable motion blur. and repeated this filter by pressing command F, I then selected the other star filter layer and applied a -45 degree angle and repeated the filter afterwards I merged the layers and named it star filter I then sharpened it by going to filter sharpen and used the unsharp mask tool: I made the amount 200% and adjusted the radius accordingly. I then created a new photoshop document of 10000 pixels by 10000 pixels I selected the rectangular marquee tool and set the style to fixed size width to 100% and height to 100px I created a selection I created a new layer and filled it with black I then went to edit free transform and clicked the triangular button before setting the Y axis to 10000 pixels then I went a stepbackwards the I pressed control/command alt shift and T 9 times then I deselected the selection I then went to filter distort and polar co-ordinates and set the mode to rectangular to polar I then made a selection of the entire document and transfered it onto the original document, I then skewed the new layer then scaled it to the image and rotated it the way I wanted it. I moved this layer below the girl and set the opacity to my liking. I then used a gradient overlay on the shape and set it to spectrum. I then added a star flare to the document, first I made a new layer and filled it with black. I wenty to filter render and lens Flare and set the brightness to 100% and chose movie prime as the lens type and positioned the light in the middle I then used a gaussian blur filter and adjusted the radius until the blue line disappears I then went to edit free transform and set the height to 10% then I went to edit free transform and rotate and set the angle to 30% and changed the blending mode to screen and pressed control, alt, shift and T 5 times and the star flare is created i will merge the lens flare one document and set the filter to screen. I the used the Hue saturation tool and colourized the flare and set the hue to 200 and the saturation to 100 and duplicated the star flare and set the hue on this flare to 180 and erased over areas that didnt need the flare with a black foreground.
And That is how I created this poster.


